Follow Me On Social Media!
The Ultimate Chocolate Chip Cookie Cake: A Celebration of Nostalgia.
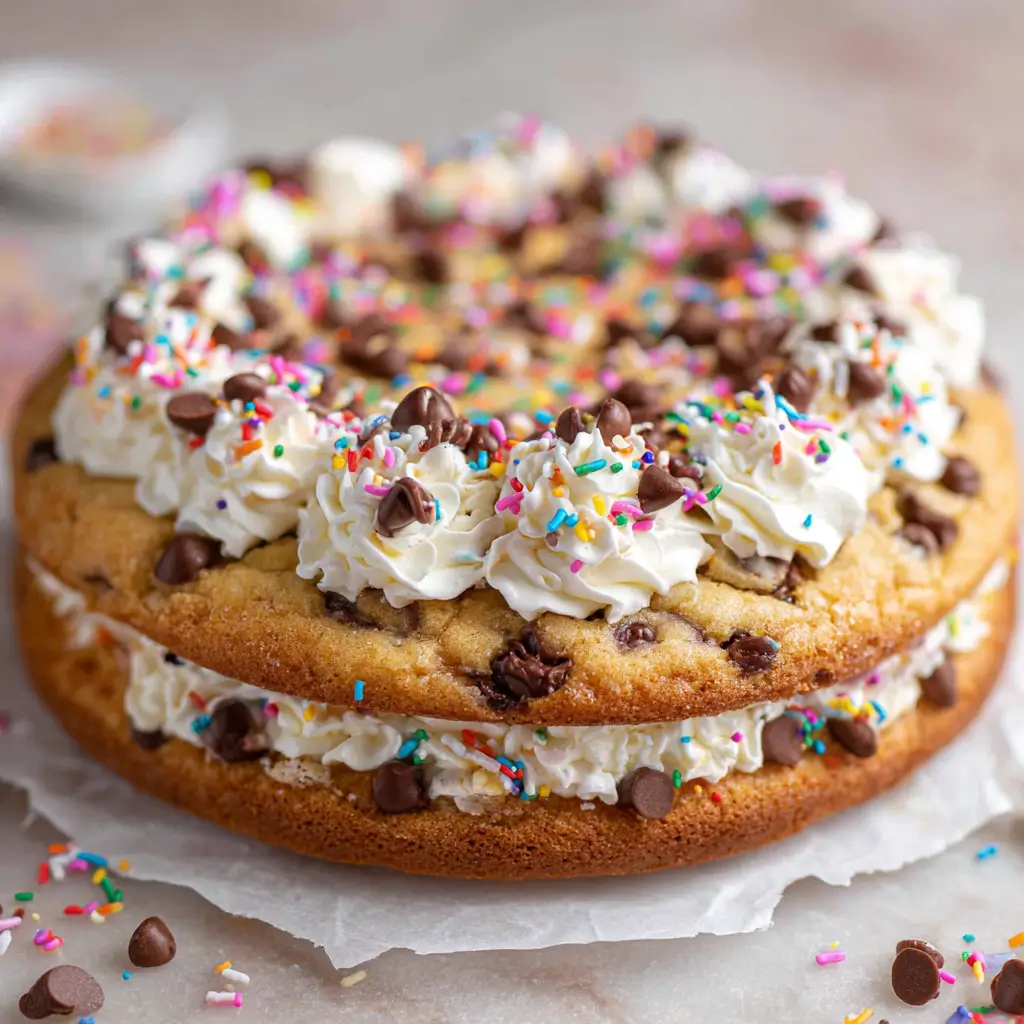
There is something inherently joyful about a giant cookie. While a standard batch of individual cookies is great for a quick snack, the Chocolate Chip Cookie Cake is a statement piece. It’s the dessert that bridges the gap between a casual afternoon treat and a festive birthday celebration. It takes the best qualities of a classic cookie—the buttery aroma, the molten chocolate pockets, and the chewy center—and amplifies them into a thick, cake-like format.
The secret to a truly great cookie cake isn’t just making a big cookie; it’s about the texture. You want a crust that is slightly crisp and golden on the edges, while the interior remains soft, almost like a cross between a blondie and a traditional biscuit. It’s a reliable crowd-pleaser that appeals to the child in everyone, offering a massive canvas for frosting and decorations.
Ingredients
To achieve that specific “mall-style” cookie cake texture that stays soft for days, we use a combination of light brown sugar for moisture and a touch of cornstarch for a tender crumb.
The Cookie Base
- Unsalted Butter: 170g (3/4 cup), softened to room temperature.
- Light Brown Sugar: 150g (3/4 cup), packed.
- Granulated Sugar: 50g (1/4 cup).
- Large Egg: 1, room temperature.
- Vanilla Extract: 2 teaspoons.
- All-Purpose Flour: 250g (approx. 2 cups).
- Cornstarch: 1 tablespoon (the secret to the soft, “bendy” texture).
- Baking Soda: 1 teaspoon.
- Fine Sea Salt: 1/2 teaspoon.
- Semi-Sweet Chocolate Chips: 200g (approx. 1 1/4 cups), plus extra for the top.
The Buttercream Border
- Unsalted Butter: 115g (1/2 cup), softened.
- Powdered Sugar: 240g (2 cups), sifted.
- Cocoa Powder: 30g (1/4 cup) for chocolate frosting, or extra sugar for vanilla.
- Heavy Cream: 1–2 tablespoons.
- Vanilla Extract: 1 teaspoon.
Instructions
Step 1: Prep the Pan
Preheat your oven to 175°C (350°F). Grease a 23cm (9-inch) round cake pan or springform pan. Line the bottom with a circle of parchment paper. This is essential for removing the giant cookie without it breaking.
Step 2: Cream the Fats and Sugars
In a large bowl, beat the softened butter, brown sugar, and granulated sugar together until the mixture is light and fluffy (about 3 minutes). Add the egg and vanilla extract, beating again until fully combined and smooth.
Step 3: Mix the Dry Ingredients
In a separate bowl, whisk together the flour, cornstarch, baking soda, and salt. Gradually add the dry ingredients to the wet mixture, mixing on low speed or by hand until just combined. Fold in the chocolate chips with a spatula.
Step 4: Shape and Bake
Press the dough evenly into the prepared pan. Use the back of a spoon or your fingers (lightly floured) to smooth out the surface. Sprinkle a few extra chocolate chips on top for that professional look. Bake for 20–25 minutes. The edges should be golden brown, but the center should still look slightly underdone—it will firm up as it cools.
Step 5: The Cooling Phase
This is the hardest part: let the cookie cake cool completely in the pan. If you try to remove it while warm, it will crack. Once cool, run a thin knife around the edge and invert it onto a plate, then flip it back onto your serving board.
Step 6: Decorate
Whip the frosting ingredients together until smooth and stiff. Pipe a decorative border around the edge of the cookie using a star tip. You can add sprinkles or a personalized message in the center.
Flavor and Texture Notes
This cookie cake is defined by its buttery, caramel-like depth provided by the high ratio of brown sugar. The texture is dense and chewy, providing a much more substantial bite than a thin cookie. Every mouthful is punctuated by the richness of semi-sweet chocolate, which balances the sweet dough. The frosting border adds a creamy, whipped finishthat makes it feel like a true celebratory cake.
Tips and Variations
- The Softness Secret: Do not overbake. A cookie cake that looks “done” in the middle when you pull it out will be hard once it cools. It should still have a slight “jiggle” in the center.
- Candy Add-ins: Swap half the chocolate chips for M&Ms or chopped peanut butter cups for extra color and flavor.
- Individual Portions: You can bake this dough in a muffin tin for “cookie cups” (adjust bake time to 12–15 minutes).
- Brown Butter Version: For a more “adult” flavor, brown the butter in a saucepan first, then let it solidify back to a soft state before creaming with the sugars. This adds a nutty, toasted aroma.
Storage and Make-Ahead
The Chocolate Chip Cookie Cake is surprisingly resilient. It can be made 24 hours in advance and kept at room temperature, covered tightly with plastic wrap. In fact, the flavors often settle and improve overnight.
Once cut, store leftovers in an airtight container for up to 5 days. If the cookie starts to feel firm, a quick 10-second zap in the microwave will bring back that fresh-out-of-the-oven softness.
Serving Suggestions
For a classic experience, serve a thick wedge of the cake with a tall glass of cold milk. If you want to elevate it to a “sundae style” dessert, serve it slightly warm with a large scoop of vanilla bean ice cream and a drizzle of hot fudge. It’s also a fantastic alternative to a traditional cake for those who prefer cookies over sponge.
FAQ
Can I use a pizza pan instead?
Yes, but the cookie will be thinner and crispier. Watch the bake time closely, as it will likely only need 15–18 minutes.
Why did my cookie cake sink in the middle?
This usually happens if the butter was too warm or melted, or if the dough was over-mixed, incorporating too much air that then collapsed in the heat.
Can I make the dough in advance?
Absolutely. You can press the dough into the pan, cover it, and keep it in the fridge for up to 48 hours before baking.
Conclusion
The Chocolate Chip Cookie Cake is a testament to the fact that sometimes, bigger really is better. It takes a beloved pantry staple and turns it into a focal point for any gathering. With its soft, chewy heart and its festive frosting crown, it’s a recipe that guarantees smiles. It’s simple, honest, and undeniably satisfying.