Follow Me On Social Media!
Vanilla Pudding Cups: A Simple and Creamy Dessert.
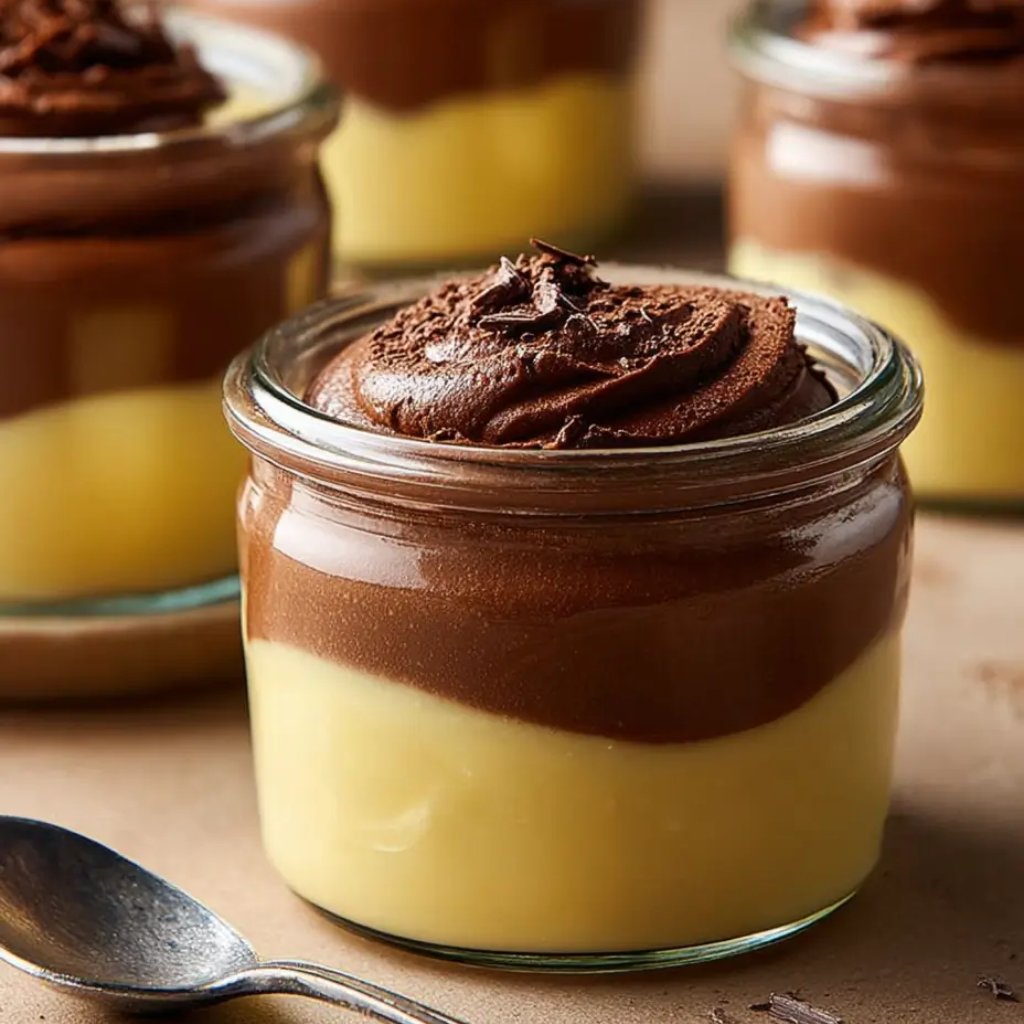
There is a pure, uncomplicated joy in a chilled cup of vanilla pudding. While the modern world often relies on instant mixes or plastic-sealed supermarket versions, the difference found in a homemade custard is staggering. This recipe returns to the basics of “scratch” cooking: using real milk, egg yolks, and high-quality vanilla to create a texture that is exceptionally silky and a flavor that is deeply nostalgic.
The beauty of this recipe lies in its gentle process. By slowly thickening the milk on the stovetop, you achieve a velvet-smooth consistency that “instant” versions simply cannot replicate. It is a naturally gluten-free dessert that feels light and elegant, making it the perfect canvas for fresh fruit, a dollop of cream, or even a crumble of your favorite cookies. It’s the kind of dish that proves vanilla is anything but “plain.”
Ingredients
To achieve the ultimate “creaminess,” the fat content of your dairy is key. While you can use lower-fat milks, whole milk provides the best structural integrity and mouthfeel.
- Whole Milk: 2 cups.
- Granulated Sugar: 1/2 cup.
- Cornstarch: 2 tablespoons (the thickening agent for that perfect “wobble”).1
- Egg Yolks: 2 large, room temperature (adds richness and a golden hue).
- Unsalted Butter: 1 tablespoon, chilled.2
- Vanilla Extract: 2 teaspoons (or use a vanilla bean for a gourmet speckled look).
- Fine Sea Salt: a tiny pinch (to heighten the sweetness).
Instructions
1. Mix the Dry Base
In a medium, heavy-bottomed saucepan, whisk together the sugar, cornstarch, and salt. It is important to mix these while dry to prevent the cornstarch from clumping once the liquid is added.
2. Temper the Eggs and Milk
In a separate small bowl, lightly whisk your egg yolks. Gradually pour the cold milk into the saucepan with the sugar mixture, whisking constantly. Once the milk and sugar are combined, whisk about 1/4 cup of this cold mixture into your egg yolks—this “tempers” the yolks so they don’t scramble when the heat is turned on. Pour the yolk mixture back into the saucepan.
3. Cook to a Thick Gloss
Place the saucepan over medium heat. Whisk constantly and gently, making sure to scrape the corners of the pan. After about 6 to 8 minutes, the mixture will begin to bubble and thicken. Once it reaches a boil, keep whisking for exactly one minute to fully activate the cornstarch.
4. The Finish
Remove the pan from the heat immediately. Stir in the chilled butter and the vanilla extract. The butter will melt into the pudding, giving it a professional, glossy sheen and a more luxurious flavor.
5. Portion and Chill
Pour the pudding into individual glass cups or small jars. To prevent a “skin” from forming on top, press a small piece of plastic wrap directly onto the surface of the pudding while it is still warm.3 Refrigerate for at least 3 hours until fully set and cold.
Flavor and Texture Notes
The first sensation is the coolness of the custard, followed by a texture that is incredibly smooth and yielding. It has a delicate “snap” to the spoon but dissolves instantly on the tongue.
Because we use real egg yolks and a touch of butter, the flavor is reminiscent of a melted vanilla bean ice cream but with a more structured, custard-like body. The salt ensures the sweetness is sophisticated rather than cloying, and the high dose of vanilla provides a warm, aromatic finish that lingers beautifully.
Tips and Variations
- The Chocolate Flip: Whisk in 1/2 cup of semi-sweet chocolate chips at the same time you add the butter for a rich chocolate pudding.
- Banana Cream: Slice a fresh banana into the bottom of each cup before pouring in the warm pudding for a quick “banana cream pie” experience.
- Infused Milk: For a more complex flavor, steep a lavender sprig or an earl grey tea bag in the milk before you start the cooking process.
- The Topping: Just before serving, remove the plastic wrap and top with a sprinkle of crushed graham crackers or a fresh raspberry.
Storage and Make-Ahead
- Refrigeration: These cups are the perfect make-ahead treat. They will stay fresh and creamy in the refrigerator for up to 4 days.
- Do Not Freeze: Unlike some desserts, cornstarch-based puddings do not freeze well; the texture will become grainy and “weepy” once thawed.
- Serving: Always serve chilled. If the pudding feels a bit too firm after a few days, a quick stir with a spoon will restore its silkiness.
FAQ
Can I make this dairy-free?
Yes, you can substitute whole milk with full-fat coconut milk or oat milk. The flavor will change slightly, but the cornstarch and egg yolks will still provide a great set.
Why is my pudding lumpy?
Lumps usually happen if the cornstarch wasn’t whisked into the dry sugar first, or if the heat was too high. If lumps do form, simply pour the warm pudding through a fine-mesh sieve before portioning it into cups.
How do I prevent the “skin” on top?
The skin forms when the surface of the pudding dries out as it cools. Placing plastic wrap or wax paper directly touching the liquid prevents air from reaching the surface.
Conclusion
Vanilla Pudding Cups are a reminder that the most satisfying desserts often come from the simplest ingredients. They are a “pantry-staple” miracle—transforming a splash of milk, a few eggs, and a dash of vanilla into a sophisticated, creamy treat. Whether you’re looking for a gentle after-school snack or a reliable dessert that stays fresh all week, these pudding cups are a reliable, delicious classic.