
Follow Me On Social Media!
Stunning Red Velvet Cake Pops: A Delicious Treat.
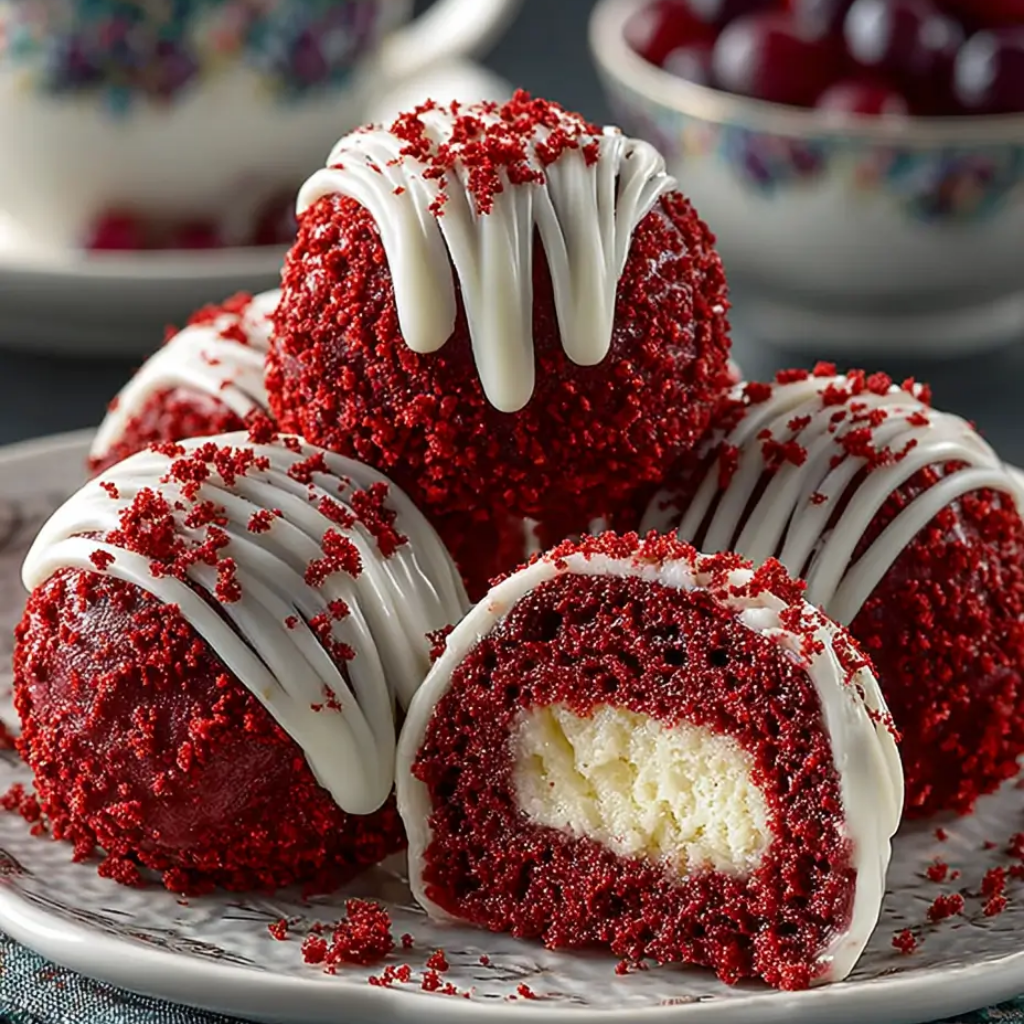
Red velvet cake pops are the perfect marriage of dramatic color and decadent texture. Unlike a standard cupcake, these pops feature a dense, truffle-like interior created by mixing crumbled cocoa-infused cake with tangy cream cheese frosting. The contrast between the bright red center and a crisp white chocolate shell makes them a visual standout for any celebration.
The secret to a professional cake pop lies in the dipping technique—achieving a smooth, glass-like finish without cracks or “feet” at the base of the stick.
Ingredients
This recipe produces approximately 20–24 cake pops.
The Red Velvet Base
- Red Velvet Cake: 1 standard 8-inch round cake (fully cooled).
- Cream Cheese Frosting: 120g–150g (roughly 1/2 cup).
- Vanilla Extract: 1/2 teaspoon.
The Coating & Assembly
- White Chocolate or Candy Melts: 400g.
- Coconut Oil: 1–2 teaspoons (to thin the coating for a smoother dip).
- Lollipop Sticks: 24 count.
- Red Sprinkles: For decoration.
Instructions
Step 1: The Crumble
Tear the cooled red velvet cake into chunks and place them in a large bowl. Use your hands or a food processor to break the cake down into fine, uniform crumbs.
Step 2: Bind the Dough
Add the cream cheese frosting and vanilla to the crumbs. Mix with your hands until the dough reaches the consistency of modeling clay. You should be able to roll a ball that holds its shape without cracking. If it’s too dry, add a teaspoon more frosting.
Step 3: Roll and Chill
Scoop about 1 tablespoon of dough and roll it into a smooth, tight ball. Place the balls on a parchment-lined tray. Chill in the refrigerator for at least 2 hours or the freezer for 20 minutes. They must be firm but not frozen solid.
Step 4: Secure the Sticks
Melt a small amount of white chocolate. Dip the tip of each lollipop stick into the melted chocolate (about 1cm deep) and then insert it halfway into a chilled cake ball. This acts as “glue” to prevent the pop from sliding off. Let them set in the fridge for 10 minutes.
Step 5: The Masterful Dip
Melt the remaining white chocolate with the oil in a deep, narrow glass. Ensure the coating is fluid and warm, but not hot. Dip the cake pop straight down until the cake is completely covered. Lift it out and gently tap your wrist to shake off the excess.
Step 6: Decorate
While the coating is still wet, add your sprinkles. Place the pops upright in a cake pop stand or a block of styrofoam to dry completely.
Flavor and Texture Notes
These pops offer a sophisticated sensory experience. The interior is moist, velvety, and tangy, with the subtle hint of cocoa characteristic of red velvet. The white chocolate shell adds a sweet, snappy crunch that shatters upon the first bite, revealing the striking crimson center.
Tips for Success
- Temperature Balance: If the cake balls are ice-cold and the chocolate is very hot, the shell will crack as it sets. Let the chilled balls sit at room temperature for 5 minutes before dipping.
- Thin the Chocolate: If the chocolate is too thick, it will pull the cake off the stick. Adding a little coconut oil makes it flow much smoother for a professional finish.
- Avoid Over-Mixing: Too much frosting will make the pops greasy and heavy. Add frosting gradually until the dough just holds together.
FAQ
| Question | Answer |
| Why did my cake pops fall off the stick? | This usually happens if the balls are too heavy or if you didn’t “glue” the stick with melted chocolate first. |
| Can I make these in advance? | Yes. You can keep the undipped balls in the fridge for 2 days. Once dipped, they stay fresh at room temperature for 3–4 days. |
| How do I store them? | Keep them in a cool, dry place. Avoid the fridge once they are dipped, as condensation can make the chocolate “sweat.” |
Conclusion
Stunning Red Velvet Cake Pops are as much a craft project as they are a culinary one. By mastering the ratio of frosting to crumb and ensuring your coating is the right temperature, you can create a professional-looking treat that rivals any boutique bakery.