Follow Me On Social Media!
Fresh Strawberry Tiramisu: A Bright, Berry-Filled Twist on the Italian Classic.
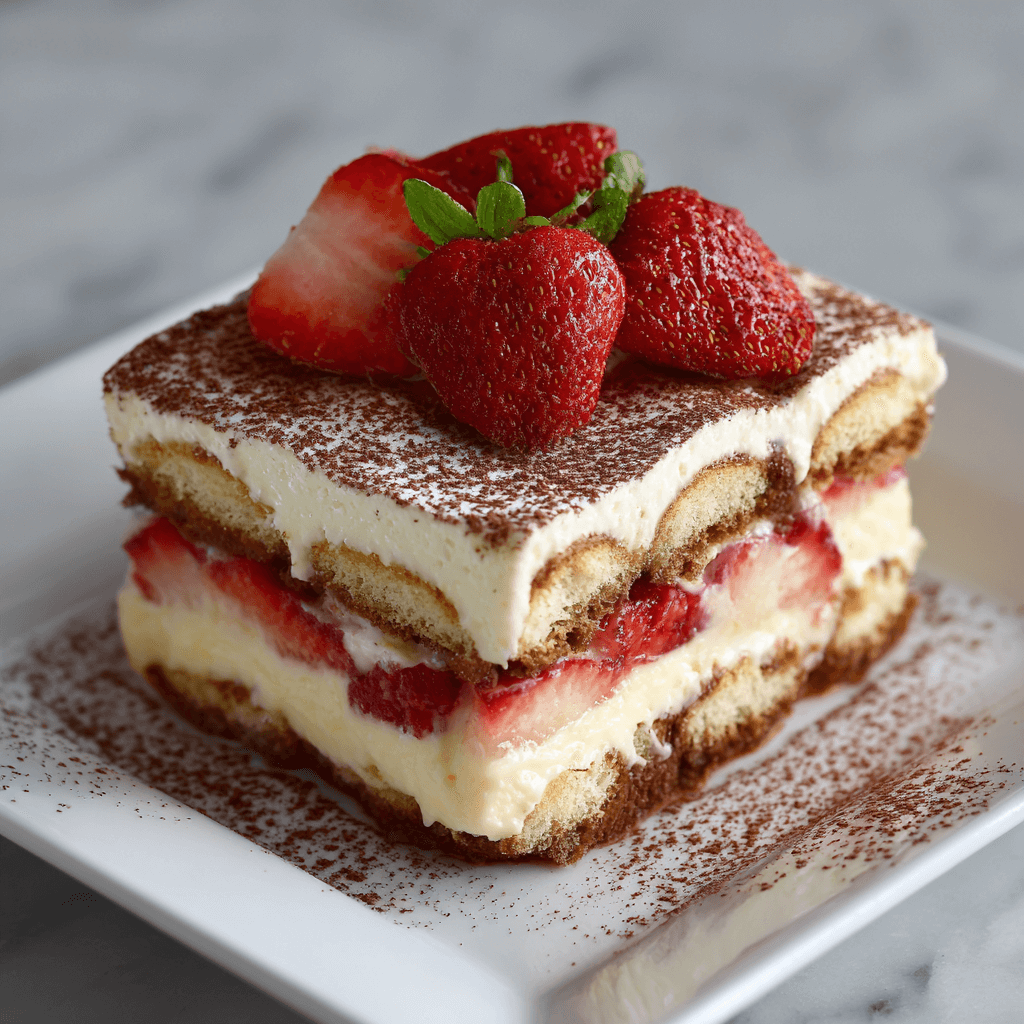
While a traditional tiramisu relies on the dark, moody intensity of espresso and cocoa, the Strawberry Tiramisu is its sun-drenched, vibrant cousin. This version is a celebration of spring and summer, replacing the bitterness of coffee with a ruby-red strawberry soak and layers of fresh, sliced fruit.
This dessert is particularly special because it manages to be incredibly light and refreshing while maintaining the velvety, cloud-like texture that makes tiramisu so iconic. It’s the perfect centerpiece for a garden party or a weekend lunch, offering a sophisticated play on “berries and cream” that feels both nostalgic and modern.
Ingredients
To get the best results, look for the most fragrant, ripe strawberries you can find. Since there is no baking involved for the fruit, the natural sweetness of the berries is the star of the show.
The Strawberry Soak
- Fresh Strawberries: 450g, hulled and sliced.
- Granulated Sugar: 50g.
- Lemon Juice: 1 tablespoon (to brighten the fruit flavor).
- Orange Liqueur: 2 tablespoons (optional, such as Grand Marnier or Cointreau).
The Mascarpone Filling
- Mascarpone Cheese: 500g, slightly softened.
- Heavy Whipping Cream: 300ml, chilled.
- Powdered Sugar: 90g.
- Vanilla Bean Paste: 1 teaspoon.
- Egg Yolks: 3 large (ensure they are fresh and pasteurized).
The Assembly
- Savoiardi (Ladyfingers): 24–30 biscuits.
- Fresh Strawberries: 200g extra, thinly sliced for layering and garnish.
- Freeze-Dried Strawberry Powder: For a final vibrant dusting (optional).
Instructions
Step 1: Prepare the Strawberry Nectar
In a medium bowl, toss the 450g of sliced strawberries with the granulated sugar, lemon juice, and liqueur. Let them sit at room temperature for at least 30 minutes. The sugar will draw out the moisture, creating a beautiful, natural syrup. Once macerated, strain the liquid into a shallow bowl; this will be your “soak” for the ladyfingers. Keep the fruit pieces to use in the middle layer.
Step 2: Whip the Cream and Mascarpone
In a large bowl, whisk the egg yolks with the powdered sugar and vanilla until the mixture becomes pale and doubles in volume. Gently fold in the softened mascarpone until no lumps remain. In a separate chilled bowl, whip the heavy cream to stiff peaks. Carefully fold the whipped cream into the mascarpone base in three additions, keeping the mixture light and airy.
Step 3: Soak the Ladyfingers
One by one, dip the ladyfingers into the strained strawberry syrup. A quick “one-two” count per side is all you need—if they stay in the liquid too long, they will become mushy.
Step 4: Layer the Dessert
Arrange a layer of the dipped biscuits in the bottom of a 20cm (8-inch) square glass dish. Spread half of the macerated strawberry pieces over the biscuits. Top with half of the mascarpone cream, smoothing it out with a spatula.
Step 5: Repeat and Chill
Repeat with a second layer of dipped ladyfingers, the remaining macerated fruit, and the rest of the cream. For a more decorative look, you can pipe the final layer of cream using a round nozzle.
Step 6: The Essential Wait
Cover the dish loosely and refrigerate for at least 8 hours, though 24 hours is ideal. This allows the biscuits to soften to a cake-like consistency and the flavors to fully meld.
Flavor & Texture Notes
This tiramisu is a study in delicate balance. The mascarpone provides a buttery, rich foundation, but the strawberry soak cuts through that richness with a zesty, floral acidity. The texture is ethereal and soft, with the fresh strawberry slices providing a juicy contrast to the creamy layers. It’s significantly less “heavy” than the original version, making it very easy to go back for a second slice.
Tips & Variations
- The “No-Egg” Version: If you prefer not to use raw yolks, simply omit them and increase the heavy cream by 100ml. The result will be a bit more like a trifle, but still delicious.
- The Puree Method: If your strawberries aren’t very juicy, pulse half of them in a blender to create a thicker “soup” for dipping the biscuits.
- The Crunch: For an extra layer of texture, sprinkle a handful of crushed pistachios or white chocolate shavings between the layers.
- Individual Jars: This recipe is perfect for assembling in small glass jars for a portable, party-friendly option.
Storage & Make-Ahead
Strawberry Tiramisu is the ultimate make-ahead dessert. It actually improves after a day in the fridge as the moisture redistributes.
- Fridge: Keep covered for up to 3 days. After this, the strawberries may begin to release too much juice, making the cream a bit watery.
- Freezing: I do not recommend freezing this dish, as the fresh strawberries and mascarpone emulsion will lose their delicate texture upon thawing.
Serving Suggestions
Serve this tiramisu chilled, straight from the refrigerator. For the best presentation, add the final decorative strawberry slices and a dusting of strawberry powder or white chocolate just before bringing it to the table. It pairs beautifully with a chilled glass of Prosecco, a sweet Moscato d’Asti, or a simple pot of herbal mint tea.
FAQ
Can I use frozen strawberries?
I wouldn’t recommend it for the layers or garnish, as frozen berries become very soft and “weep” liquid as they thaw. However, you can use thawed frozen strawberries to make the syrup for the soak.
Why is my tiramisu runny?
This usually happens if the ladyfingers were soaked for too long or if the heavy cream wasn’t whipped to stiff enough peaks before being folded into the mascarpone.
Is the orange liqueur necessary?
Not at all. It adds a lovely “grown-up” depth, but if you’re serving this to children or prefer to avoid alcohol, simply replace it with an equal amount of fresh orange juice.
Conclusion
The Strawberry Tiramisu is a refreshing departure from tradition that never fails to impress. It captures the essence of summer in a single dish, offering a sophisticated play on fruit and cream that is both light and indulgent. Once you see the beautiful layers through the side of the glass dish, you’ll know exactly why this has become a modern favorite.