Follow Me On Social Media!
Peanut Butter & Jelly Cups: A Sophisticated Twist on a Classic.
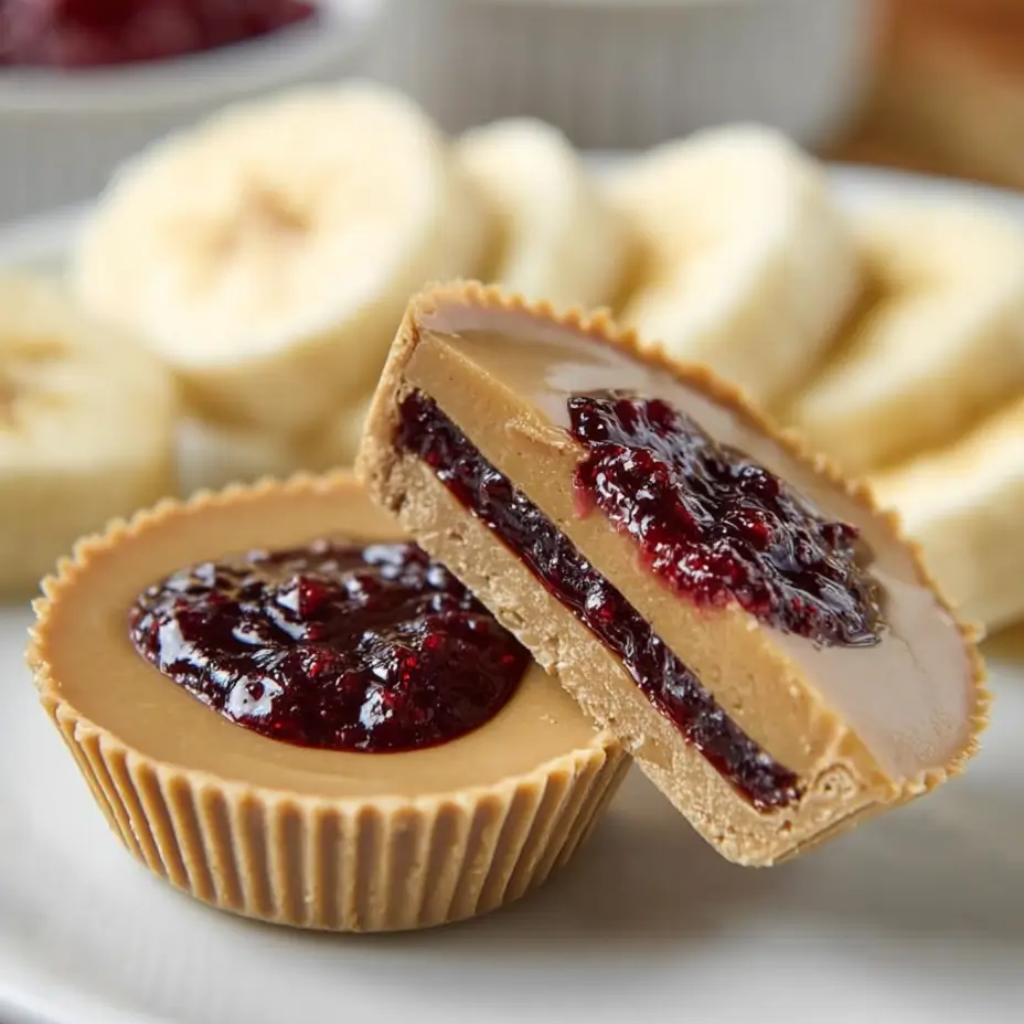
The Peanut Butter & Jelly (PB&J) cup is a nostalgic nod to the quintessential school-lunch sandwich, reimagined as a premium, bite-sized confection. By replacing bread with a crisp shell of dark chocolate and filling it with creamy nut butter and vibrant fruit preserves, you transform a childhood staple into a sophisticated treat. These cups offer a satisfying snap followed by a molten, salty-sweet center that is far superior to any store-bought candy.
This recipe is prized for its “no-bake” simplicity and its ability to be customized based on your favorite jam or nut butter. It relies on the physics of tempering chocolate—ensuring a glossy finish and a clean break—while maintaining a soft, spreadable interior. It is an honest, reliable recipe that works perfectly as a homemade gift, a party snack, or a balanced afternoon treat.
Ingredients
The Chocolate Shell
- 340g Semi-Sweet or Dark Chocolate: Finely chopped.
- 1 Tablespoon Coconut Oil: Helps thin the chocolate for easier coating and adds a professional sheen.
The PB&J Filling
- 125ml Creamy Peanut Butter: Natural or traditional.
- 60ml Raspberry or Strawberry Jam: Use a high-quality preserve for the best flavor.
- 1/4 Teaspoon Sea Salt: (Only if using unsalted peanut butter).
- Optional: Flaky sea salt for topping.
Instructions
1. Prepare the Liners
Line a standard muffin tin with 12 paper liners, or use a mini-muffin tin for 24 smaller, “bite-sized” portions.
2. Melt the Chocolate
Using a double boiler or the microwave in 30-second intervals, melt the chocolate and coconut oil together. Stir until perfectly smooth and glossy.
3. Create the Base
Place about one tablespoon of melted chocolate into the bottom of each liner. Use the back of a small spoon to slightly push the chocolate up the sides of the liner—this creates a “nest” that will hold the filling. Place the tin in the freezer for 10 minutes to set the base.
4. Add the Filling
Once the base is firm, place a small dollop (about 1 teaspoon) of peanut butter in the center of each cup. Follow this with a small dollop of jam directly on top of the peanut butter. Try to keep the filling centered so it doesn’t touch the edges of the paper liner.
5. The Top Coat
Pour another tablespoon of melted chocolate over the filling, ensuring it flows down the sides to meet the bottom layer, effectively sealing the peanut butter and jelly inside. Gently tap the tin on the counter to level the tops and remove any air bubbles.
6. The Final Set
Sprinkle a tiny pinch of flaky sea salt on top of each cup if desired. Place the tin in the refrigerator for at least 45 minutesuntil the chocolate is completely hard.
Flavor & Texture Notes
The primary sensation of these cups is textural harmony. You have the firm, cool snap of the dark chocolate meeting the salty, velvety richness of the peanut butter.
The jam provides a tart, fruity burst that cuts through the fats of the chocolate and nuts, mirroring the classic PB&J experience. The sea salt garnish is essential; it heightens the cocoa notes and makes the fruit flavors feel more pronounced.
Tips & Variations
- The Almond Twist: Replace peanut butter with almond or cashew butter for a different nutty profile.
- Crunchy Version: Use extra-crunchy peanut butter to add a mechanical texture to the filling.
- The “Grown-Up” Jam: Try using a spicy pepper jelly or a dark blackberry preserve for a more complex flavor.
- White Chocolate: Use white chocolate for the shell for a sweeter, “creamsicle-style” treat.
Storage & Make-Ahead
- Refrigeration: Store these in an airtight container in the fridge for up to 2 weeks. They are best enjoyed slightly chilled.
- Freezing: These freeze beautifully. You can keep them in a freezer bag for up to 3 months. They can be eaten straight from the freezer for a firmer, fudge-like experience.
- Room Temperature: If your kitchen is cool, they can sit out for a few hours, but the coconut oil in the chocolate makes them prone to softening in warm weather.
FAQ
Why did my chocolate turn white or cloudy?
This is called “bloom.” It usually happens if the chocolate was heated too quickly or if there was a drastic temperature change. It is still perfectly safe to eat, though it may not look as professional.
Can I use “natural” peanut butter?
Yes, but ensure you stir it very well before using. If the peanut butter is too runny, the top layer of chocolate might sink into it. You can stir a teaspoon of coconut flour into runny peanut butter to help it hold its shape.
My jam is leaking out of the sides. What happened?
This means the top layer of chocolate didn’t fully seal with the bottom layer. Make sure you leave a small gap between the filling and the edge of the cup so the chocolate can “lock” together.
Conclusion
Peanut Butter & Jelly Cups are a masterclass in how a few simple ingredients can be elevated through careful layering. By focusing on a clean chocolate seal and high-quality preserves, you create a treat that is far more rewarding than any store-bought alternative. It is a foolproof recipe that consistently delivers a nostalgic yet premium snacking experience.